
Wondering why Multifactor Authentication is important?
17 STEPS
1. The first step is to open the Family Portal. If it is your first login, you will be prompted to enroll in Two Factor Authentication. If you are a GCDS faculty/staff member, no action is required - you are automatically enrolled in 2FA.
Click on your initials in the upper right corner.
Then, click Manage Multi-Factor Authentication.

Next, click Set up next to the Enroll section.
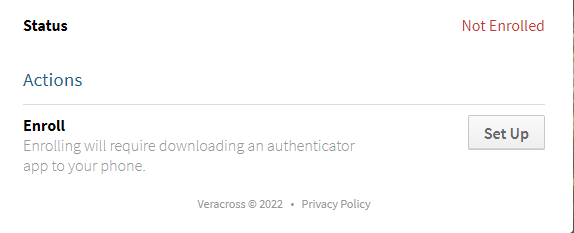
2. Once you see a QR code on your screen, you are ready to begin the MFA enrollment process. Have your mobile device ready.
3. You will need to download an authentication app. We recommend using Authy, which is available for Android and iOS devices, but you can use any authentication app you wish. Download the app to your device.
4. Open the app once it has bene installed.
5. Once the app opens, press Add Account.
6. You will need to scan the QR code that's on your computer screen. Click Scan QR Code.
7. You may need to give the app access to your camera.
8. Scan the QR code on your screen.
9. You may be prompted to backup your Authy account to keep it safe if you lose your phone. You can Enable Backups or Skip.
10. You will be prompted to give your account a nickname. Press Save once finished.
11. Once your account has been added, your will be shown a one-time verification code. The verification code expires and resets after 30 seconds. You now need to enter the verification code on the Veracross website where you originally scanned your QR code.
12. Type Verification Code
13. Click Verify
14. You will be given a recovery code in case you ever lose your phone and need to access your Veracross account. Write down this code and store it in a safe place, and then check the box.
15. Click Continue
16. Once you see that the Enrolled status, you will know that you have successfully completed the MFA enrollment process!
17. If you ever need to change your phone or enroll a new device, you can login to Veracross, click on your initials in the upper right corner, and click "Manage Multi-Factor Authentication."
Here's an interactive tutorial
** Best experienced in Full Screen (click the icon in the top right corner before you begin) **